Thursday, September 26, 2013

Custom order Halloween

I love opening Facebook and finding a message from someone looking for a custom order card! Now, multiply that by six, and you can imagine my excitement! 

There is something so satisfying in meeting a need; creating the perfect little piece of art; making someone's day. 

And when I work with a customer on a custom order, all of those things happen!

My friend needed a bunch of not-so-scary Halloween cards. No witches, ghosts, or ghouls. So I went with pumpkins and adorable owls. 

Aren't they just precious? 

Lots of paper piecing can be a bit tedious (especially those eensy, weeny, tiny black pupils on those owls!), but the results are phenomenal! 

I'm certain that the children receiving these cards will love them just as much as I do!

Happy stamping!

Sunday, September 22, 2013

Custom order 50th anniversary

Lately, I have been super busy working on my favorite kinds of projects. Custom orders! I know how frustrating it can be to make a trip to the drug store to find that perfect card that says just the right thing, in just the right way, for that very special someone, only to be utterly let down when what you were thinking of doesn't exist. (I'm pretty sure that was a run on sentence, but because I'm not being graded on my blog, I'm gonna let it slide. Ok? Ok!)

A customer needed a 50th anniversary card and a cookie cutter, mass produced card just wasn't going to cut it. Fifty years together is sadly, practically unheard of these days. It's an amazing accomplishment and the occasion needed a very special, one of a kind, card. To make it 50 years, a couple needs lots and lots of love (and elbow grease), so I decided to use (yup, you guessed it!) Perfectly Preserved! Are you sick of this stamp set yet? Hearts overflowing and spilling out of a jar feels like fifty years of love to me. 

Of course a card celebrating a golden anniversary needed a golden touch! So I heat embossed some gold embossing powder onto card stock and used a circle punch. A subtle, classy touch!

Happy stamping!

Custom order canning tags

Goody, goody! Another custom order! A friend has been canning her little heart out, bless her soul. She's a better woman than me. I don't enjoy the process of canning, but I totally enjoy the spoils! My friend has been canning gifts to give away at Christmas and wanted some tags to tie onto the mason jars. So I got right to work!

We talked about what she wanted inside the jars, how many tags she needed, and  how big the tags should be. 

I pulled out my Big Shot, current favorite stamp set, Perfectly Preserved, their matching Framelits, my inks and papers and hunkered down for some serious stamping and die cutting! Each tag has at least ten little pieces to create, assemble, and adhere. Whew!

But I have to say, that when I was all done and lined them all up, they are just wonderful! I think they are my favorite special order to date. 

And they make me want to drag out my canning gear. Well, almost...

Happy stamping!

Friday, September 20, 2013

Indian summer

My favorite part of the tail end of summer, here in the northeast, is the corn harvest! Stanton's Farm grows the sweetest corn I have ever experienced. Corn that pops with juicy freshness when you bite into an ear! So I made them a card this year to tuck into their "on your honor" box when I buy my last baker's dozen of the year. 

I had fun making two ears sugar and butter corn. But I had a blast making an ear of Indian corn! The blue kernels, the red kernels, the brown. 

Don't forget to support your local farm stands! Squash and pumpkins, and apples! Oh my! 

Happy stamping!

Monday, September 16, 2013

Alternative canning

I used to can. Applesauce mostly. I used to pretend that I loved it. But really, it's a pain in the neck. All the sterilization. Crazy hot kitchen. Lots of washing, scrubbing, boiling, bubbling, hissing. Hot sweaty mess. Maybe that's why I love the Perfectly Preserved stamp set so much! Canning without the hassle. Of course, there's no applesauce when I'm done, but there sure is an adorable card!

Again, I used vellum for the mason jar. To me, it's the perfect vehicle for making the mason jars look a bit more real.

Of course, I had to try a mason jar without the vellum, and it's cute too. This time I concentrated on the pears. After you cook them during the canning process, they are lighter in color than when they started, so I made my canned pears with markers, and stamped the raw pears with classic ink pads. I'm pretty tricky!

I love using hemp twine, or linen thread on the jar covers. Again, it just adds that little bit of detail that makes cards so interesting!

Happy stamping!

Saturday, September 14, 2013

Mason jar love

You'll be seeing a lot of mason jars for awhile here. That's because I borrowed Perfectly Preserved and Cannery Framelits from a friend. I am in love with this coordinating set! It's perfect for this time of year.

I love using vellum for the mason jars! On this jar, I sponged some Marina Mist on the Crumb Cake card stock underneath the jar hoping it would look like water. I also used vellum for the flowers, with white embossing powder. I love how they turned out!

I sandwiched some Chocolate Chip grosgrain ribbon between the layers of card stock for some contrast of color.

These cute little flowers were just begging to be gathered up and put into a bouquet! So that's just what I did, gluing them onto Old Olive stems. The background paper was ripped from an old gardening book and I sponged Old Olive and Soft Suede onto it to age and soften it.

I sliced through the mason jar vellum so that the stems looked as if they were inside the jar. Clever, huh?

Happy stamping!

Thursday, September 12, 2013

Baby shower custom order

Another custom order! I have to be honest, I LOVE working with people on custom orders! There is something so satisfying about working together to create the perfect card. Hallmark offers a dizzying array of greeting cards, but sometimes they just don't have exactly what you had in mind.

Such is the case here. My best friend, who is an amazing paper crafter herself, just returned to her full time job, after a month off. Her kids have started back to school, and she has been planning and crafting, and cooking for her niece's baby shower. Phew! I'm tired from just typing all of that! Being the wonderful, creative woman that she is, a store bought baby shower card wasn't going to cut it. So, she turned to me for a bit of crafting help. 

The shower has a country theme. Lots of mason jars are involved! So she wanted to incorporate that in a card. There's also a bit of Duck Dynasty thrown in for good measure! So we started brainstorming ideas for a card. We discussed a little camouflage, but thankfully, it got left on the cutting room floor. Here's what we settled on.

It's a gift card holder! I have made these for my family, and when they are opened up, everyone gasped, and oohed, and ahhed! Truly they did! Even my brother-in-law was impressed. To open the card, you pull the polka dotted band out from under the bee on the back of the card.

When you open it up, it's a pop up that holds a gift card! I wish I had taken this picture with a gift card inserted between the polka dot rectangles, but I didn't. You'll have to use your imagination! Or you could check out the gift card holders I made for my family in this post.


I cant wait to hear from my friend after the shower! I hope that her family gasps, and oohs and ahhs too!

Happy stamping!

Flowers and pearls

I've been on a punch kick lately. So much so that I've had to get out the old aluminum foil to sharpen many of my punches! I've also been using a lot of pearls too. Sometimes they are just what a project needs to take it to the next level. 
This card is a perfect example of that. Before the pearls, I thought that the card was finished. I loved the cute window for the sentiment. Riding Hood Red was just the right pairing for So Saffron. My flower punches helped me pull this together in just a few minutes. 

But something wasn't sitting well with me. I'd walk away, and come back to it a few minutes later and the card just felt flat. Dull. Even boring! Then it hit me. Pearls! And they made all things right in my world. Well, not really. But I was happy with my card! ; )

Happy stamping!

Punches and forgotten colors

Sometimes I forget about my punches. Which is silly because punches are all about ease, and saving time! And who doesn't love that? I had also forgotten about two colors. I think that we all have color combinations that we love. That are our go-tos. That we keep coming back to. Well, because I had been using so much aqua and orange, I had totally forgotten about Crushed Curry and Island Indigo!


Both colors are so rich and saturated! And they look gorgeous next to each other. Using them with Cajun Craze really makes them pop!

Happy stamping!

Tuesday, September 10, 2013

My favorite card... ever

Yesterday I had a blast using punches to make cute little pumpkins. Playing with the embossed pieces made me wonder what else I could do with just a simple circle punch. So I picked out some rich, fall inspired colors. Elegant Eggplant, Cherry Cobbler, Tangerine Tango, Daffodil Delight, Crumb Cake. (Don't you just love the way Stampin' Up names their colors?)

I adhered the embossed, 1" circles in layers and added a bit of gold embossing powder to the sentiment. A bit of organza ribbon was the final elegant touch on this card, which has become my favorite. I want to make a ton if these, all in different color combinations!

Happy stamping!

Monday, September 9, 2013

Pumpkin love

A few punches and embossing folders. A bit of patterned paper and ribbon. The result? A couple of super cute, fall themed cards!


I had to make one of these for my father-in-law who has a birthday coming up. 

TextI can't get over how adorable the pumpkins turned out!

Happy stamping!

Sunday, September 8, 2013

Getting creative with school supplies

When the kids were in elementary school, I loved school supply shopping! We were mailed a list of supplies from the children's teachers and we went on our merry way and bought everything on the list. Fast forward to middle school. No lists were mailed, but there was a list on the school's website. So when our first child hit middle school, we accessed the list, and bought everything on it. Only to find, after she came home from the first day of school, that the list was totally bogus. She didn't have everything that she needed, and worse, she had some things that she didn't need. And high school was worse. No lists at all!

So now, we send our girls to the first day of school armed with a folder, some loose leaf, a pen and a pencil. They come home with a list from each individual teacher, and we hit Staples after school. Along with every other student and their parents! It's kind of like Black Friday shopping. Carts bumping into each other and fights breaking out over the last scientific calculator! It's not like Black Friday in that nothing ever seems to be on sale on the first day of school.

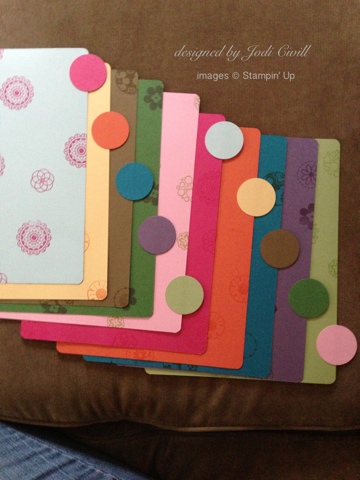
Which leads me to my project for today. Binder dividers. My eighth grader needed... 14!!! I didn't buy 14 binder dividers. I made them! I rounded the corners of an 8 1/2" x 11" sheet of card stock and punched them with our three hole punch. Then I punched two 1 3/4" circles and sandwiched the sheet of card stock between them. A bit of stamping to decorate them, and voila! Fourteen binder dividers that didn't cost me a penny!

When my junior in high school saw them, she ordered ten of them for herself! I love how they came out.

Happy stamping!

Saturday, September 7, 2013

Time to get girly

Sometimes, even I, get a little bit girly. It doesn't happen often, but sometimes, I get a whole lot girly! Like with this card. I couldn't help myself! I started with the flower image from Gentler Times, a retired set that I haven't used that much, but lately, I've fallen in love with it! I decided to use my Aquapainters and I had a great time water coloring. When I finished, I knew that I wanted to soften the look of the image. It looked too stark against the clean watercolor paper. 
I clear embossed the ledger image from By the Tide and sponged a bit of Crumb Cake and Pear Pizzazz over top of that. 

I couldn't leave the mat just plain. The girly side of me had taken over. I got out my Versa Mark, and embossed the Helli Doily stamp with Gold Embossing Powder. 
I went nuts and made the edge of the card all fru-fru with a fancy scalloped edge that I dry embossed. I love how this card turned out! 

Happy stamping!

Thursday, September 5, 2013

Custom orders

I love filling special orders! I was asked for some thank you, sympathy, and friendship cards by a customer. So I got right to work today and cranked a bunch out! Nine cards for my customer, and one for me.
I borrowed a tried and true layout for the thank you cards. I love making the background paper with the water misting technique I blogged about here:
http://www.somethingaboutstamping.blogspot.com/2013/07/making-mess.html

For me, sympathy cards are tricky. I try to keep them clean and simple.

And I had some fun with the friendship cards! My customer doesn't like coming up with what to write on the inside of a card, so I stamped some simple friendship verses inside these, but forgot to take a picture of them!

Don't forget that I'd love to work with YOU on a custom order! Leave a comment and we can work out the details.

Happy stamping!

Tuesday, September 3, 2013

Fall sponging

Around here, we are gearing up for school's first day on Friday. Only three more days to go before the girls climb onto that big yellow bus at 6:45am. Not that I'm counting down the days... But all this prepping has got me longing for fall's schedules, cooler temperatures, and crock pot meals. Fall has always been my favorite season, and with thanks in mind, here's my project for today!

Sponging is quickly becoming my go-to technique. I love how impressive a card looks with a bit of sponging. My husband thought that this piece took me hours! I didn't have the heart to tell him the truth. It came together in mere minutes. But that is part of sponging's lure for me. A big bang for minimal effort!

Happy stamping!

Sunday, September 1, 2013

Nothing is perfect

My Stampin' Up Stamp Club is challenged each month to come up with a card based on a sketch. Of course, I can't enter the competition, but I do join in on the fun and design a card or two. This is the card I came up with this month! 

The sketch was all straight lines, but I wasn't in a straight line kind of mood, so I took creative license and adhered most elements a bit cock eyed! And I love the sense of playfulness it gives an otherwise serious card. Had I adhered everything with straight lines, I think it would have been a stuffy card. That's why I chose "thanks" intsead of "Thank You". The more casual greeting helps to take the edge off too! 

Those are the things that I love about this card. But there is one thing that is driving me crazy as I write this post. Now that I'm looking at it again, I should have matted the main image in white. What do you think?

Happy stamping!